Application
Application
| 2002-2010 | Chrysler | 300 |
| 2003-2010 | PT | Cruiser |
| 2004-2008 | Chrysler | Pacifica |
| 2004-2010 | Chrysler | Sebring |
| 2004-2011 | Chrysler | Town and Country |
What you need to know (please read before ordering)
What you need to know (please read before ordering)
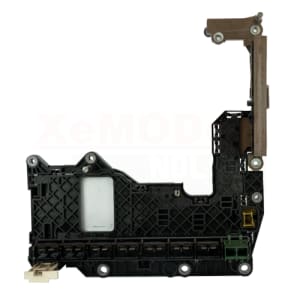
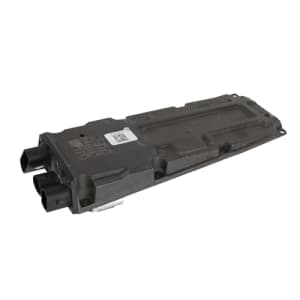
This is a Repair Service of your existing module. You will need to remove and send your module to us for repair using the shipping labels provided to you.
The order will be processed during our regular business hours (Mon-Fri 8:30 – 5:00 EST). After processing your order, we will email shipping labels and shipping instructions. If you do not see shipping labels within 1 hour of submitting your order (during business hours) please first check your junk/spam folders. If you still do not see the labels, please contact us at 1-888-712-2525
Features:
Plug & Play: The software and settings will not be modified, making this module plug and play. No software reload or programming is required after installation.
Quick Turnaround: Your module will be tested, repaired, tested again, and sent back to you in the same day (unless otherwise noted).
Lifetime Limited Warranty: This module comes with our Lifetime Limited Warranty. Please see here for more information.
Reference Numbers
Reference Numbers
5094149AC | 5094149AD | 5094149AE | RL094149AF | RL094149AF | 5094149AB | 5094149AF | 5094149AF | 5094148AB | 5094148AC | 5094148AD | 5094148AE | 5094148AF | RL094148AF | 4692074AA | R5094597AD | 5094598AD | 5094598AC | 5094595AC |5094597AC | 5094597AD | RL094597AD | R5150255AC | 5150255AC | RL150255AC | 56044787AC |5150275AB | 5150248AC | 5150275AA | RL150275AB | 5150466AA | 5150467AB |5150498AA | 5150467AA | RL150467AB | 5150583AC | 5150582AB | 5150582AC | R5150582AC | 5150631AB | 5150583AB | R5150583AC | RL150583AC | 56044396AD | 56044396AH | 56044703AB | 56044703AC | 56044703AD | 56044711AE | RL044703AD | 56044698AC | 56044698AB | RL044698AC | R6044703AD | 56044743AB | 56044743AC | 56044743AD | 56044749AC | 56044752AC | RL044743AD | 05150588 | R6044743AD | | 68052505 | 68052506 | 68052511 | 68052512 | 68052513 | 68052514 | 68084866 | 68106007 | 68106016 | 68106017 | 05150588AA | 05150588AB | 05150588AC | 68052505AA | 68052505AB | 68052505AC | 68052505AD | 68052505AE | 68052505AF | 68052505AG | 68052505AH | 68052505AI | 68052505AJ | 68052505AK | 68052505AL | 68052505AM | 68052505AN | 68052506AA | 68052506AB | 68052506AC | 68052506AD | 68052506AE | 68052506AF | 68052506AG | 68052506AH | 68052506AI | 68052506AJ | 68052506AK | 68052506AL | 68052506AM | 68052506AN | 68052511AA | 68052511AB | 68052511AC | 68052511AD | 68052511AE | 68052511AF | 68052511AG | 68052511AH | 68052511AI | 68052511AJ | 68052511AK | 68052511AL | 68052511AM | 68052511AN | 68052512AA | 68052512AB | 68052512AC | 68052512AD | 68052512AE | 68052512AF | 68052512AG | 68052512AH | 68052512AI | 68052512AJ | 68052512AK | 68052512AL | 68052512AM | 68052512AN | 68052513AA | 68052513AB | 68052513AC | 68052513AD | 68052513AE | 68052513AF | 68052513AG | 68052513AH | 68052513AI | 68052513AJ | 68052513AK | 68052513AL | 68052513AM | 68052513AN | 68052514AA | 68052514AB | 68052514AC | 68052514AD | 68052514AE | 68052514AF | 68052514AG | 68052514AH | 68052514AI | 68052514AJ | 68052514AK | 68052514AL | 68052514AM | 68052514AN | 68084866AA | 68084866AB | 68084866AC | 68084866AD | 68084866AE | 68084866AF | 68084866AG | 68084866AH | 68084866AI | 68084866AJ | 68084866AK | 68084866AL | 68106007AA | 68106007AB | 68106007AC | 68106007AD | 68106007AE | 68106007AF | 68106007AG | 68106016AA | 68106016AB | 68106016AC | 68106016AD | 68106016AE | 68106016AF | 68106016AG | 68106017AA | 68106017AB | 68106017AC | 68106017AD | 68106017AE | 68106017AF | 68106017AG | R5150588AC | RL150588AC
Common Failure Symptoms
Common Failure Symptoms
Please note* This repair is limited to issues related to the vehicle’s charging system. Specifically, when the alternator is not charging the battery. For any other PCM Issues please contact us. In most cases we can supply a pre-programmed, plug and play unit at additional charge.
• Code P2503 – Charging System Voltage Low
• Battery won’t charge even after alternator replacement
• No field current supplied to the alternator
Charging System Operation
Charging System Operation
The Electronic Voltage Regulator (EVR) is not a separate component. It is actually a voltage regulating circuit located within the Powertrain Control Module (PCM). The EVR is not serviced separately.
Charging System: Description and Operation
The charging system consists of:
– Generator
– Decoupler Pulley (If equipped)
– Electronic Voltage Regulator (EVR) circuitry within the Powertrain Control Module (PCM)
– Ignition switch (refer to the Ignition System section for information)
– Battery (refer to the Battery section for information)
– Ambient Air Temperature (If equipped)
– Inlet Air Temperature (calculated battery temperature) (If equipped)
– Voltmeter
– Wiring harness and connections
– Accessory drive belt
– Battery Temperature sensor (if equipped)
The charging system is turned on and off with the ignition switch. The system is on when the engine is running and the ASD relay is energized. The
ASD relay is energized when the PCM grounds the ASD control circuit. This voltage is connected through the PCM or IPM (intelligent power module)
(if equipped) and supplied to one of the generator field terminals (Gen. Source +) at the back of the generator.
The generator is driven by the engine through a serpentine belt and pulley or decoupler pulley arrangement.
The amount of DC current produced by the generator is controlled by the EVR (field control) circuitry contained within the PCM. This circuitry is connected in series with the second rotor field terminal and ground.
An Ambient air temperature sensor is used to calculate the temperature near the battery. This temperature data, along with data from monitored line
voltage (battery voltage sense circuit), is used by the PCM to vary the battery charging rate. This is done by cycling the ground path to control the
strength of the rotor magnetic field. The PCM then compensates and regulates generator current output accordingly to maintain system voltage at the
targeted system voltage based on battery temperature.
All vehicles are equipped with On-Board Diagnostics (OBD). All OBD-sensed systems, including EVR (field control) circuitry, are monitored by the PCM. Each monitored circuit is assigned a Diagnostic Trouble Code (DTC). The PCM will store a DTC in electronic memory for certain failures it detects and illuminate the (MIL) lamp. Refer to On-Board Diagnostics in the Electronic Control Modules.
The Charging system “Battery” light indicates problems with the charging system (voltage too high/ low, generator failure, etc.). If an extreme condition is indicated, the lamp will be illuminated. The signal to activate the lamp is sent via the PCI bus circuits. The lamp is located on the instrument panel.
The PCM uses the ambient air temperature sensor to control the charge system voltage. This temperature, along with data from monitored line voltage, is used by the PCM to vary the battery charging rate. The system voltage is higher at cold temperatures and is gradually reduced as the calculated battery temperature increases.
The ambient temperature sensor is used to control the battery voltage based upon ambient temperature (approximation of battery temperature). The PCM maintains the optimal output of the generator by monitoring battery voltage and controlling it to a range of 13.5 – 14.7 volts based on battery temperature.
How This Service Works
How This Service Works
Step 1: Purchase our service online or over the phone.
Step 2: After processing your order, we will email you pre-paid shipping labels.
Step 3: Send us your old defective unit by dropping off the package to any UPS location, or call UPS to schedule a pick up.
Step 4: We will inspect and repair your old module.
Step 5: We will send you back the repaired module the same day (unless otherwise stated).
Step 6: You install the unit back into your vehicle.
For more detailed instructions, please see here.


